The MongoDB for IntelliJ Plugin is currently in Public Preview.
To install the MongoDB for IntelliJ Plugin from the JetBrains Marketplace, follow the
steps on this page.
Ensure that you install IntelliJ IDEA Ultimate 2024.3 or later.
To check your current version of IntelliJ IDEA, open the
IntelliJ IDEA system menu and click About IntelliJ IDEA.
Open the IntelliJ IDEA system menu and click
Settings.
Alternatively, press Cmd + , on macOS or Ctrl +
Alt + S on Windows and Linux.
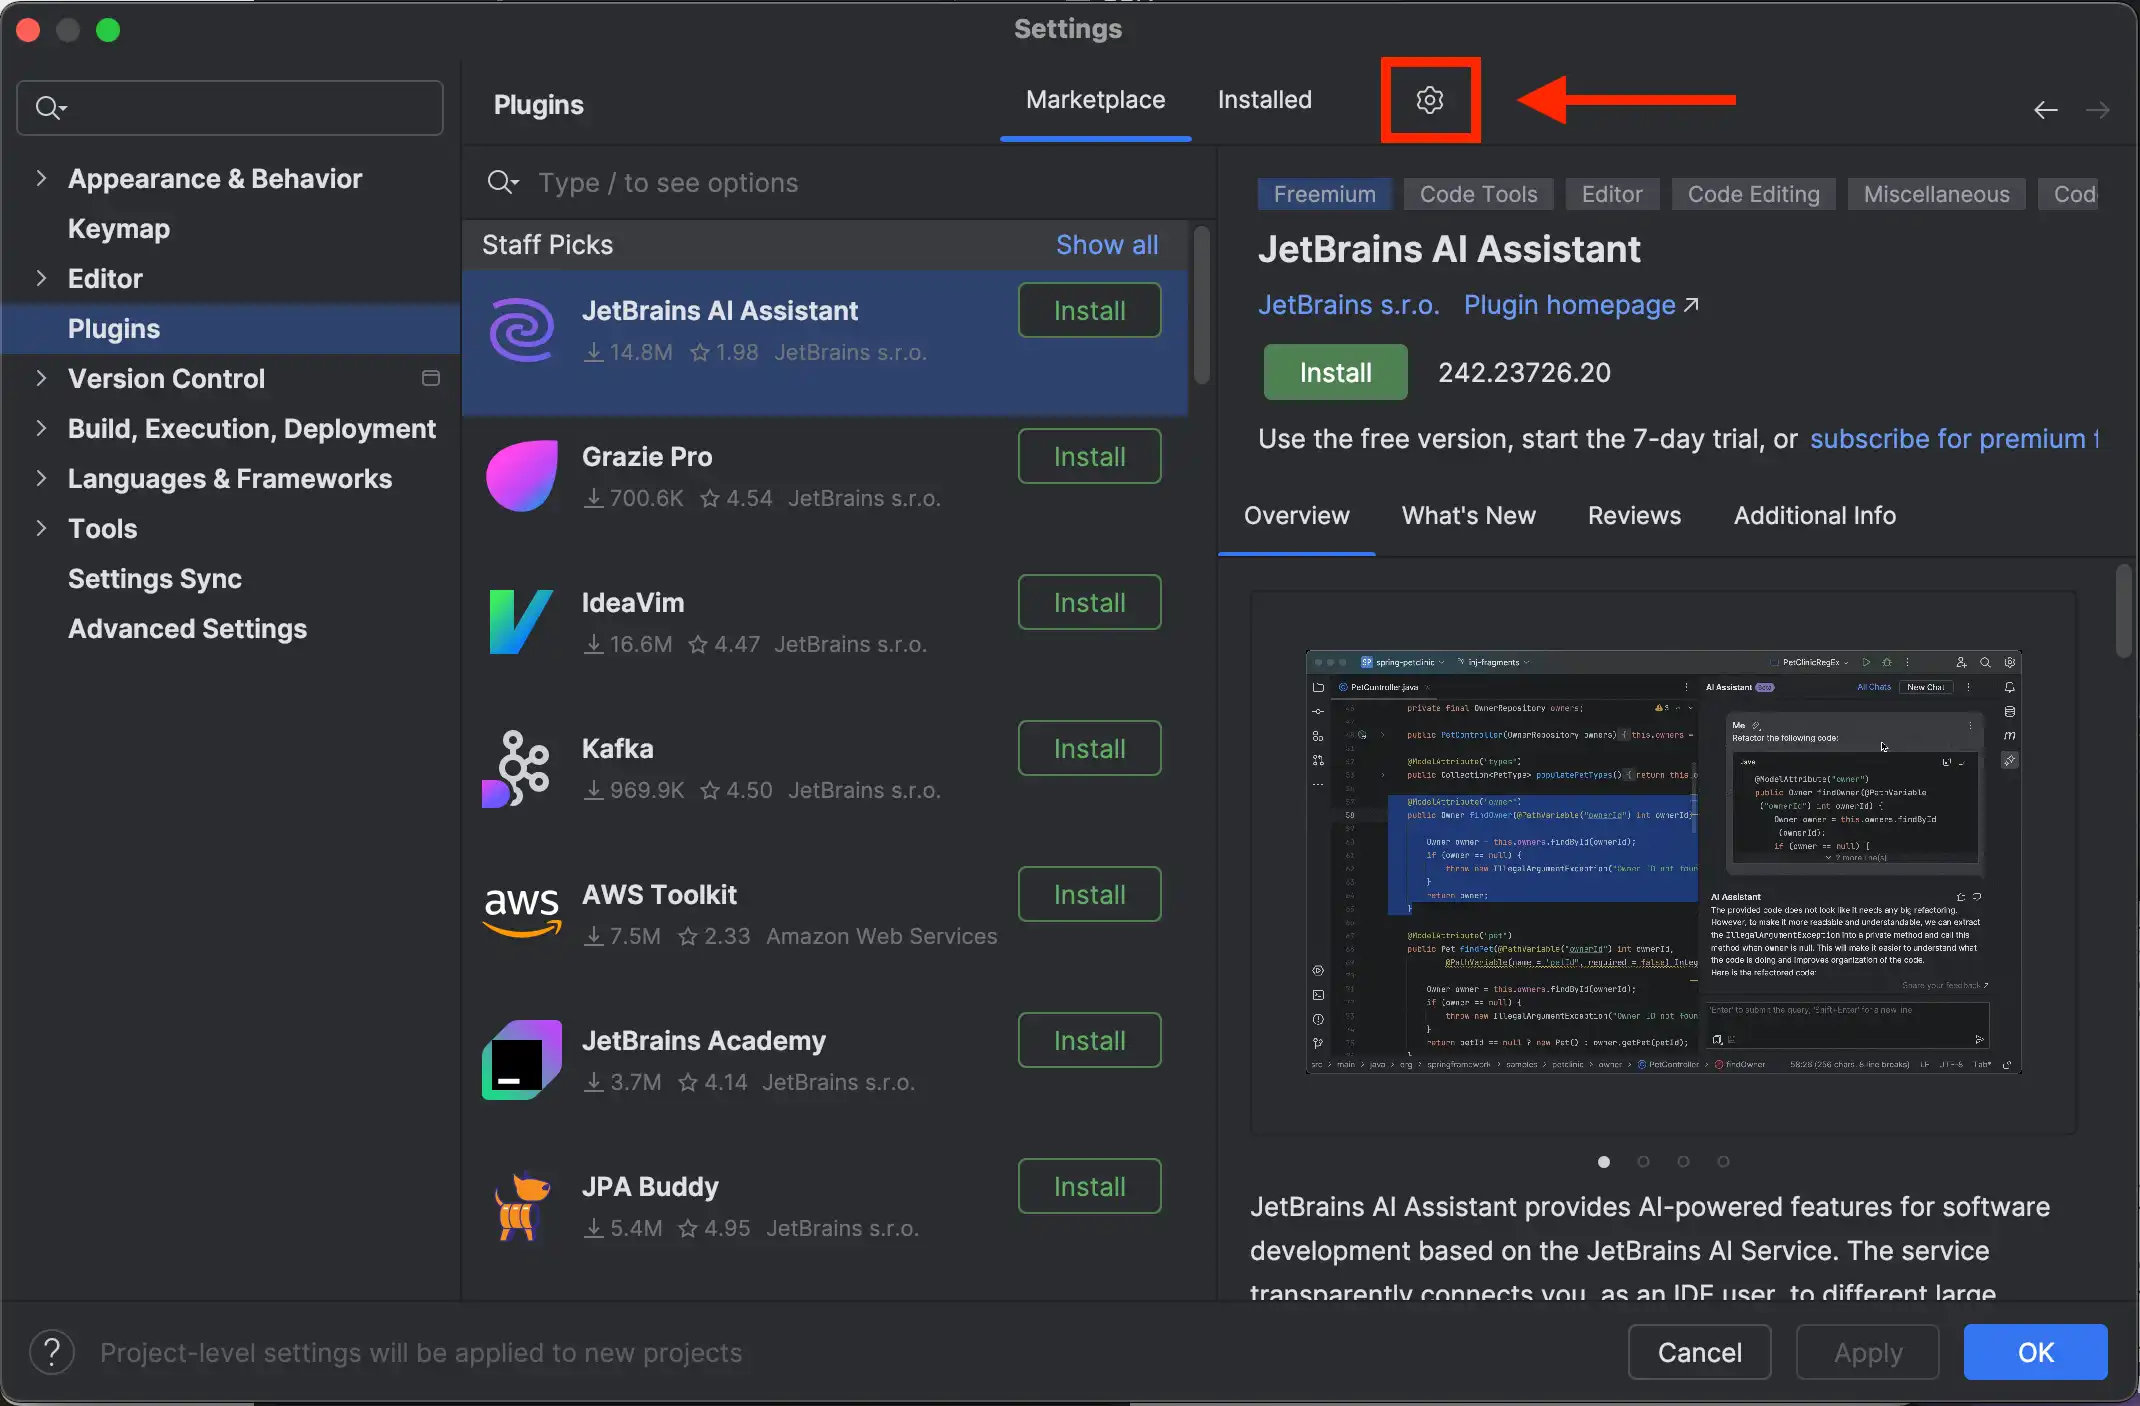
In the left-hand navigation column, click Plugins.
Click the gear icon next to the Installed tab to open a
drop-down menu. In the drop-down menu, select
Manage Plugin Repositories.
In the Custom Plugin Repositories modal, click the
+ icon to add a new repository.
Paste the following URL:
| https://plugins.jetbrains.com/plugins/beta/list |
After you restart the IDE, open the Settings menu and
click Plugins again.
In the Marketplace tab of the Plugins settings,
search for MongoDB.
Important
Make sure to download only the official MongoDB plugin from MongoDB Inc
on the JetBrains Marketplace.
After you install the IntelliJ Plugin, click OK.

