Flask is a widely adopted Python framework for building web applications. It allows Python developers to use their preferred language with all of its assets while building scalable and fast-to-start Python web applications. MongoDB Atlas is MongoDB’s Database-as-a-Service platform that allows developers the flexibility of working with complex data while developing faster than ever. The MongoDB Atlas platform is simple to set up and scale, making it the perfect database for web applications.
Integrating the Flask application with MongoDB creates a strong and scalable application stack. In this article, we will guide you through how to connect your Flask application to MongoDB Atlas.
PyMongo Support for Flask
PyMongo is the official MongoDB Driver for Python. Any Python application can consume the PyMongo driver by importing it and using the MongoClient instance. Flask applications can leverage PyMongo to access our MongoDB Atlas database.
Since Flask is all about improving the developer experience when developing web applications, the community created a widely adopted helper called Flask-PyMongo which is a wrapper around PyMongo, closely integrated with Flask. This article will use this framework to work with the free tier cluster available in MongoDB Atlas, allowing you to try this stack for free.
Getting Started with Flask-PyMongo
Mflix application is a known example movie browsing application on MongoDB University. The entire sample project is located in our mongodb-developer/flask-pymongo-example github repo.
You can clone this project and explore the README to set up your demo application or follow this article as we go over the essentials of this project.
In order to showcase a Flask application example integrated with Atlas, we will use the sample_mflix database in the MongoDB Atlas sample dataset. The facade of “mflix” application will use Flask-PyMongo library, exploring the basic Create, Read, Update, and Delete (CRUD) operations together with text search and aggregations.
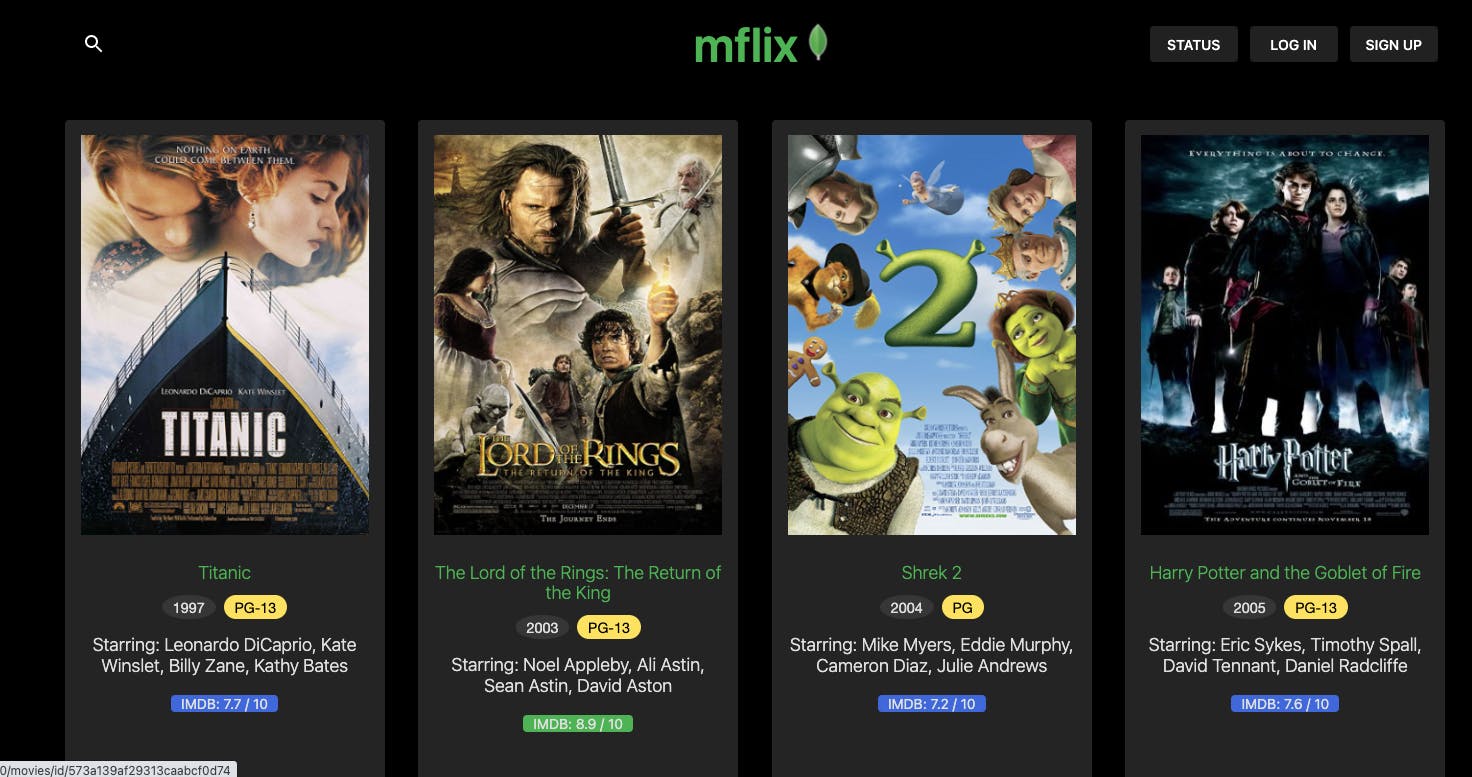
This project uses a UI layer in a minified ReactJS front end and a Python Flask application to host the front end, and the back-end API to access the movies database.
Project Structure
The mflix directory holds the application logic. This includes:
db.py- Location where all database CRUD patterns are exposed as functions. This is also where the Flask-PyMongo helper is used to interact with MongoDB Atlas.api/movies.py- Location where the web API is exposed to the UI and routes requests to appropriate database functions.
The main directory holds the following files:
run.py- Location where the Flask application is initialized and the config is loaded.sample_ini- Location where the connection URI to MongoDB Atlas is configured.requirements.txt- Location where the dependencies this project needs to run are found.
How to Install Flask with PyMongo
The project uses a standard pip installation requirements file that lists the latest version of the needed dependencies:
requirements.txt
Flask
pymongo[srv]
Flask-PyMongo
Those will allow us to wire the Flask application instance with the PyMongo client using Flask-PyMongo Helper, as placed in the db.py file:
import bson

from flask import current_app, g
from werkzeug.local import LocalProxy
from flask_pymongo import PyMongo

from pymongo.errors import DuplicateKeyError, OperationFailure
from bson.objectid import ObjectId
from bson.errors import InvalidId


def get_db():
    """
    Configuration method to return db instance
    """
    db = getattr(g, "_database", None)

    if db is None:

        db = g._database = PyMongo(current_app).db

    return db


# Use LocalProxy to read the global db instance with just `db`
db = LocalProxy(get_db)
The above code initializes a global “db” object once using the MONGO_URI read from the .ini file:
config = configparser.ConfigParser()
config.read(os.path.abspath(os.path.join(".ini")))

if __name__ == "__main__":
    app = create_app()
    app.config['DEBUG'] = True
    app.config['MONGO_URI'] = config['PROD']['DB_URI']

    app.run()
We will replace the template sample_ini file with a relevant Atlas cluster connection string:
[PROD]
DB_URI = mongodb+srv://<username>:<password>@<your-atlas-cluster-address>/sample_mflix
Getting Your Connection String
In order to create the client, you will need to pass the connection string to access your database.
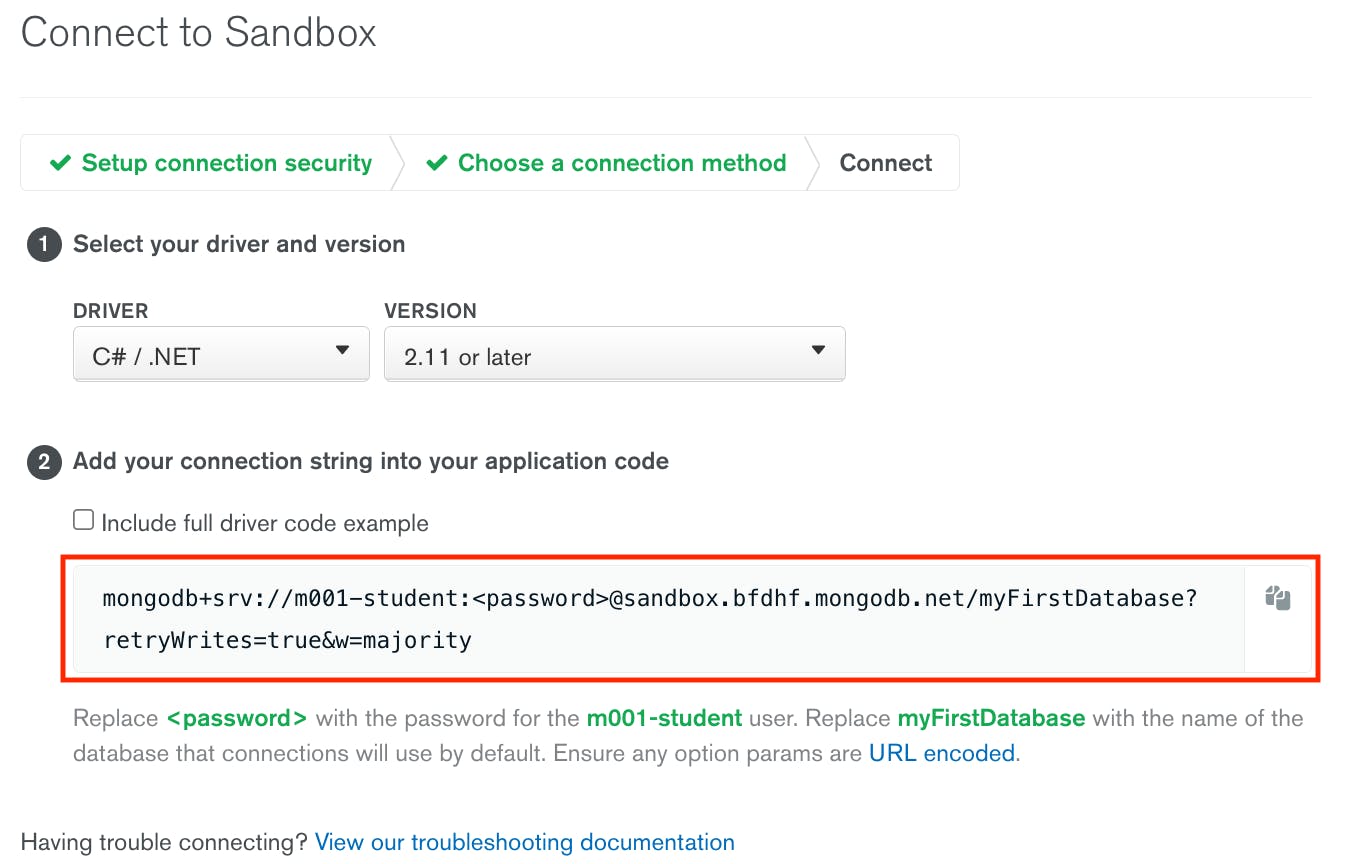
The connection string can be found in the Atlas UI. The following steps will show you how to get your connection string:
- Visit the Atlas UI and ensure you are logged into your account.
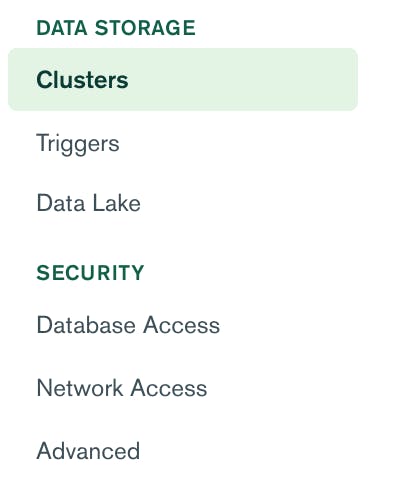
Ensure you are on the Clusters page. It should be the default page but if not, select it from the left-hand menu on the page.
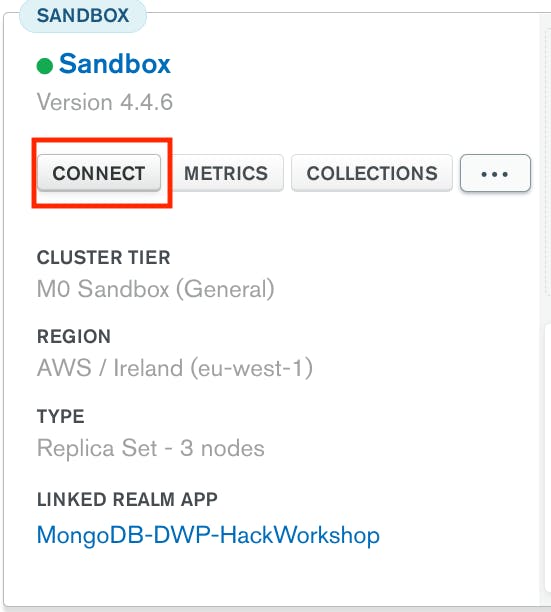
Click the “Connect” button for the Cluster you created earlier.
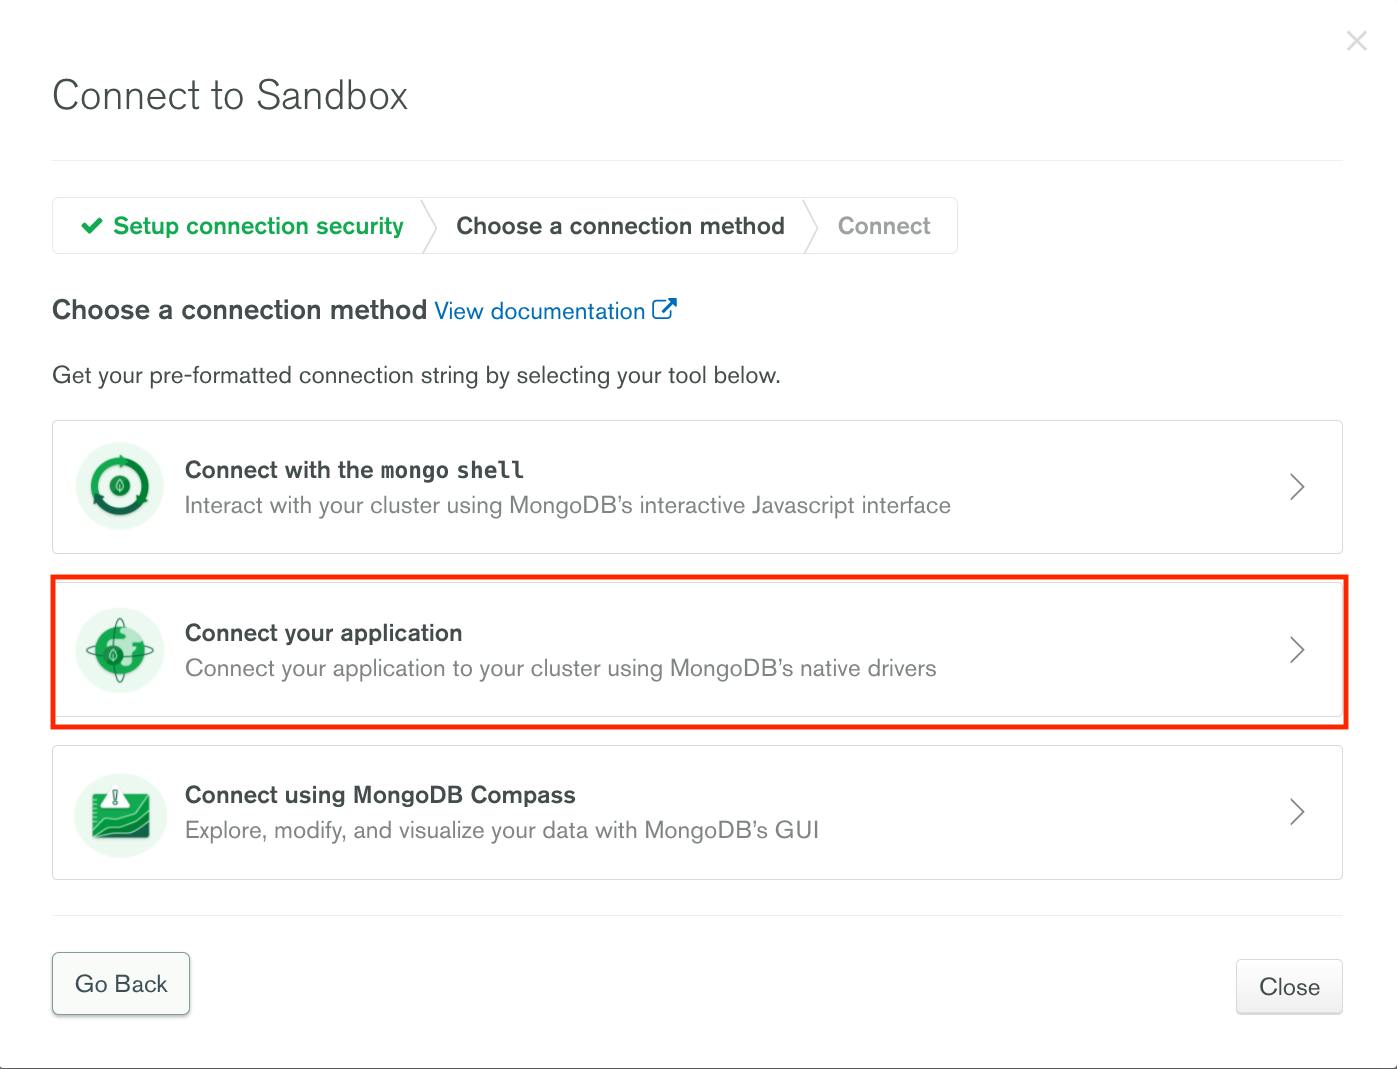
Select “Connect your application.’”
Copy the provided connection string into the create code, substituting any values within <>, such as <password>, with your details.
Starting the Application
Working with virtual environments in Python is a good practice, so for our example application, let’s create one named mflix_venv:
# clone the github repo
git clone git@github.com:mongodb-developer/flask-pymongo-example.git

# navigate to the project directory
cd flask-pymongo-example

# create the virtual environment for MFlix
python3 -m venv mflix_venv

# activate the virtual environment
source mflix_venv/bin/activate
Install Dependencies:
python3 -m pip install -r requirements.txtEdit sample_ini to have your Atlas connection string:
[PROD]
DB_URI = mongodb+srv://<username>:<password>@sandbox.abcd.mongodb.net/sample_mflix
Rename the sample_ini to .ini file:
mv sample_ini .iniStart the application:
python ./run.pyThis will output console messages about the server startup and its status. Your application should be available via a browser on http://localhost:5000.
How to Store Data Using PyMongo and Flask
All database access is routed through the global “db” object initialising the PyMongo client. The special variable object “g” is used here to define the PyMongo database in the global application context.
db = g._database = PyMongo(current_app).dbIn MongoDB, information is stored in BSON Documents. BSON is a binary, JSON-like structure. It supports the same data types as JSON with a few extras such as date, raw binary, as well as more number types such as integer, long, and float.
A collection is what MongoDB calls a group of documents in one container. Let’s cover the basic Create, Read, Update, and Delete operations.
Create
The creation of documents can be done via the collection object and insert_one method. Let's look at the “add_comment” function:
def add_comment(movie_id, name, email, comment, date):
    """
    Inserts a comment into the comments collection, with the following fields:

    - "name"
    - "email"
    - "movie_id"
    - "text"
    - "date"

    Name and email must be retrieved from the "user" object.
    """

    comment_doc = { 'movie_id' : movie_id, 'name' : name, 'email' : email,'text' : comment, 'date' : date}
    return db.comments.insert_one(comment_doc)
The above function receives comment attributes and inserts one document into the comments collection.
Read
Reads in MongoDB can be done via a query using find or find_one which returns a cursor of documents or a single document respectively. Another option is to use aggregations to perform a more complex search or restructuring of data. For more information on aggregations, see this documentation.
Our application query can filter movies using both find and aggregate methods:
Find in get_movies
cursor = db.movies.find(query).sort(sort)The find method is searching the movies collection and providing a query criteria and sort document based on user input. See this code in db.py file.
Aggregate in get_all_genres
def get_all_genres():
    """
    Returns list of all genres in the database.
    """
    return list(db.movies.aggregate([
        {"$unwind": "$genres"},
        {"$group": {"_id": None, "genres": {"$addToSet": "$genres"}}}
    ]))[0]["genres"]
The aggregation unwinds the genres array in each document and calculates a distinct list of possible genres.
Update
To update a document, a collection object can use the update_one method. In our example, we’re providing a filter and updated values for text and date of a comment:
def update_comment(comment_id, user_email, text, date):
    """
    Updates the comment in the comment collection. Queries for the comment
    based by both comment _id field as well as the email field to doubly ensure
    the user has permission to edit this comment.
    """

    response = db.comments.update_one(
        { "comment_id": comment_id },
        { "$set": { "text ": text, "date" : date } }
    )

    return response
Delete
To delete a document, a collection object can use the delete_one method. In our example, we’re providing an _id of a comment to delete it:
def delete_comment(comment_id, user_email):
    """
    Given a user's email and a comment ID, deletes a comment from the comments
    collection
    """


    response = db.comments.delete_one( { "_id": ObjectId(comment_id) } )

    return response
What's Next?
Flask, PyMongo, and MongoDB Atlas offer a great stack to build your web Python applications and easily scale and host them. Using this guide, you can start building your own application today with MongoDB Atlas.
FAQs
Can I use MongoDB with Flask?
MongoDB works great with Flask applications using the PyMongo driver. Additionally, the Flask-PyMongo helper is there to make the integration even simpler.
What is Flask used for in Python?
How do you use MongoDB with Python Flask?
How do you install Flask-PyMongo?
How do you use PyMongo in Python?
Read here for more information on how to import the driver into your Python module or application.