Migrating your data from DynamoDB to MongoDB Atlas
There may be a number of reasons you are looking to migrate from DynamoDB to MongoDB Atlas. While DynamoDB may be a good choice for a set of specific use cases, many developers prefer solutions that reduce the need for client-side code or additional technologies as requirements become more sophisticated. They may also want to work with open source technologies or require some degree of deployment flexibility. In this post, we are going to explore a few reasons why you might consider using MongoDB Atlas over DynamoDB, and then look at how you would go about migrating a pre-existing workload.
Get building, faster...
MongoDB Atlas is the best way to consume MongoDB and get access to a developer-friendly experience, delivered as a service on AWS. MongoDB’s query language is incredibly rich and allows you to execute complex queries natively while avoiding the overhead of moving data between operational and analytical engines. With Atlas, you can use MongoDB’s native query language to perform anything from searches on single keys or ranges, faceted searches, graph traversals, and geospatial queries through to complex aggregations, JOINs, and subqueries - without the need to use additional add-on services or integrations.
For example, MongoDB’s aggregation pipeline is a powerful tool for performing analytics and statistical analysis in real-time and generating pre-aggregated reports for dashboarding.
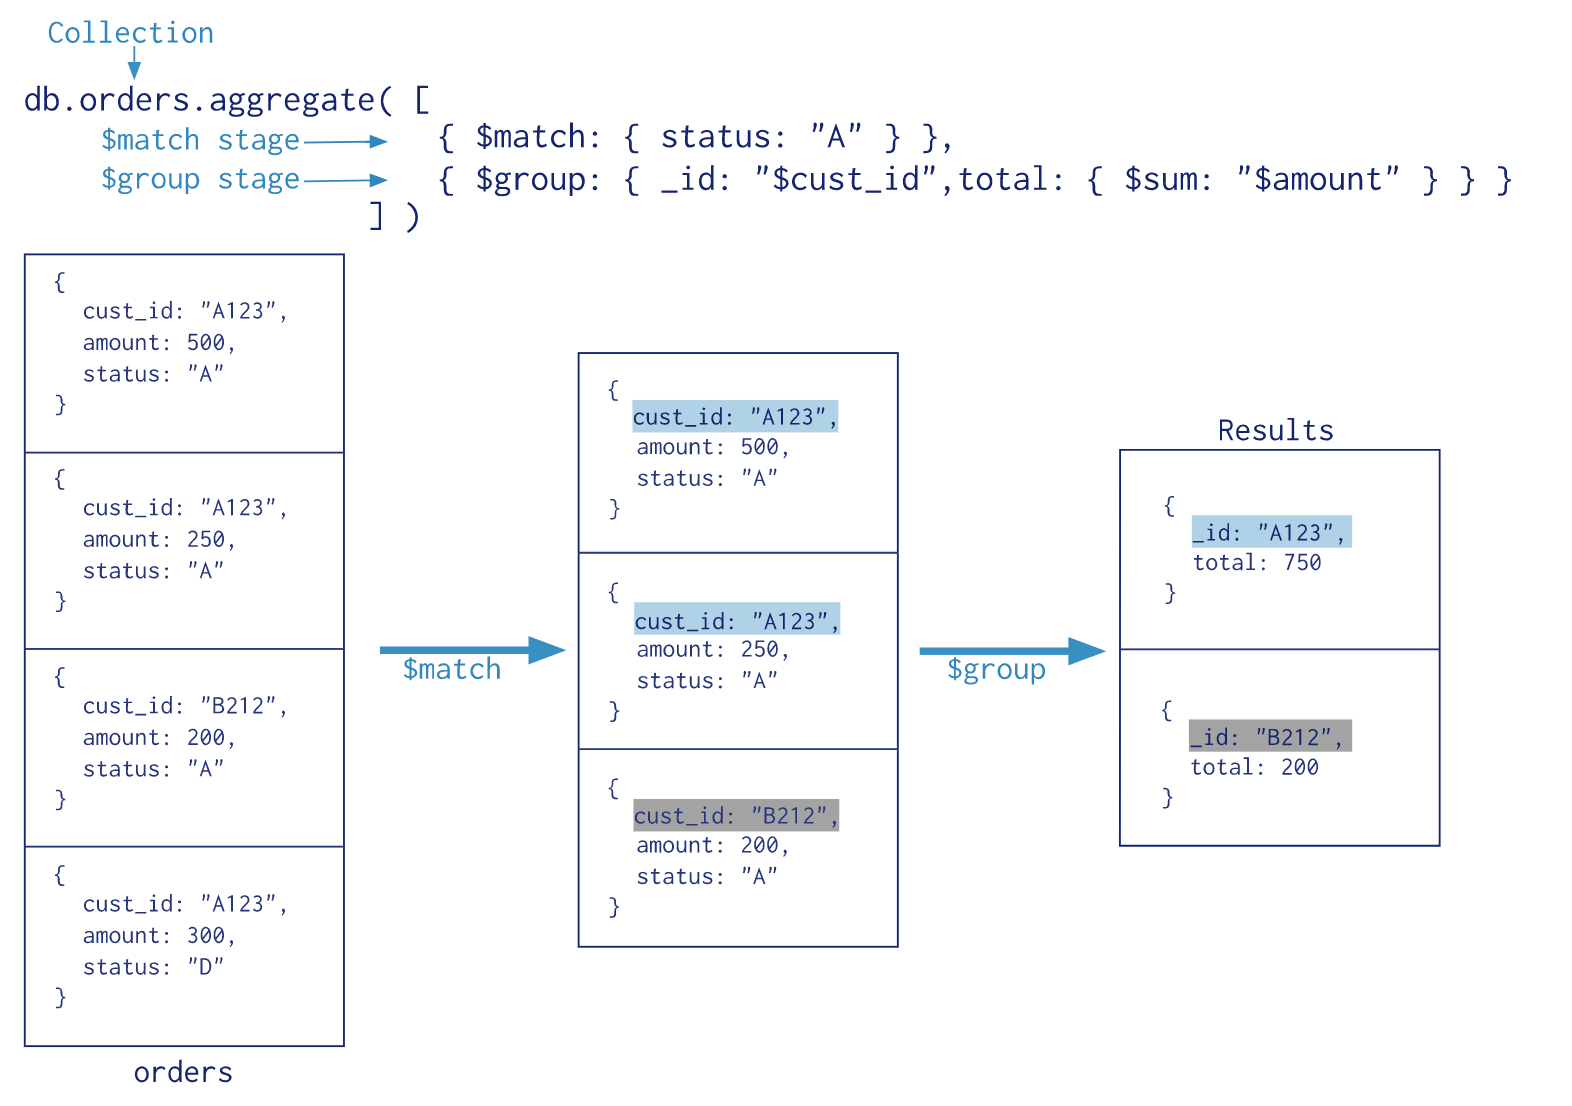
Additionally, MongoDB will give you a few extra things which I think are pretty cool:
- Document Size - MongoDB handles documents up to 16MB in size, natively. In DynamoDB, you’re limited to 400KB per item, including the name and any local secondary indexes. For anything bigger, AWS suggests that you split storage between DynamoDB and S3.
- Deployment flexibility - Using MongoDB Atlas, you are able to deploy fully managed MongoDB to AWS, Google Cloud Platform, or Microsoft Azure. If you decide that you no longer want to run your database in the cloud, MongoDB can be run in nearly any environment on any hardware so self-managing is also an option.
- MongoDB has an idiomatic driver set, providing native language access to the database in dozens of programming languages.
- MongoDB Atlas provides a queryable backup method for restoring your data at the document level, without requiring a full restoration of your database.
- MongoDB Atlas provides you with over 100 different instance metrics, for rich native alerting and monitoring.
- Atlas will assist you in finding the right indexes thanks to Performance Advisor. The Performance Advisor utility is on all the time, helping you make certain that your queries are efficient and fast.
Getting Started
In this tutorial, we'll take a basic data set from an existing DynamoDB table and migrate it to MongoDB Atlas. We'll use a free, M0 cluster so you can do this as well at no cost while you evaluate the benefits of MongoDB Atlas.
This blog post makes a couple of assumptions:
You've installed MongoDB on the computer you'll be importing the data from (we need the mongoimport tool which is included with MongoDB) You've signed up for a MongoDB Atlas account (the M0 instance is free and fine for this demonstration)
To begin, we'll review our table in AWS:
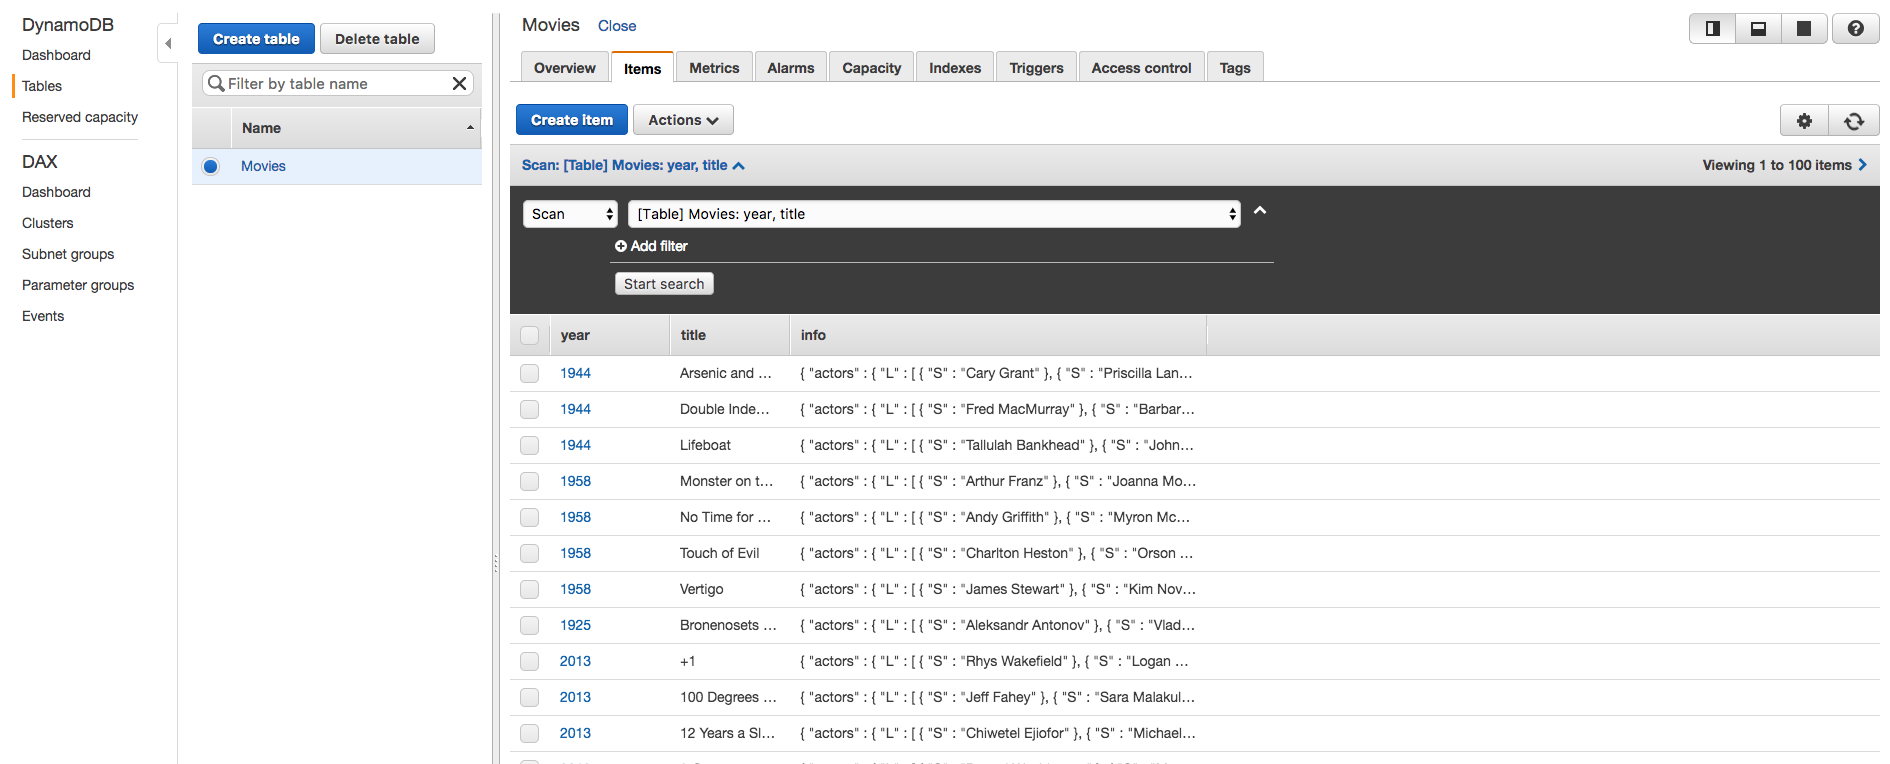
This table contains data on movies including the year they were released, the title of the film, with other information about the film contained in a subdocument.
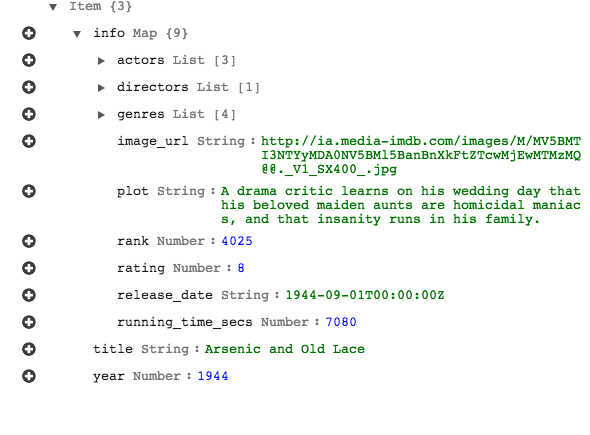
We want to take this basic set of data and bring it into MongoDB Atlas for a better method of querying, indexing, and managing our data long term.
First, ensure your application has stopped your writes if you are in production to prevent new entries into your database. You'll likely want to create a temporary landing page and disable new connections to your DynamoDB. Once you've completed this, navigate to your table in your AWS panel.
Click "Actions" at the top after you've selected your table. Find the "Export to .csv" option and click it.
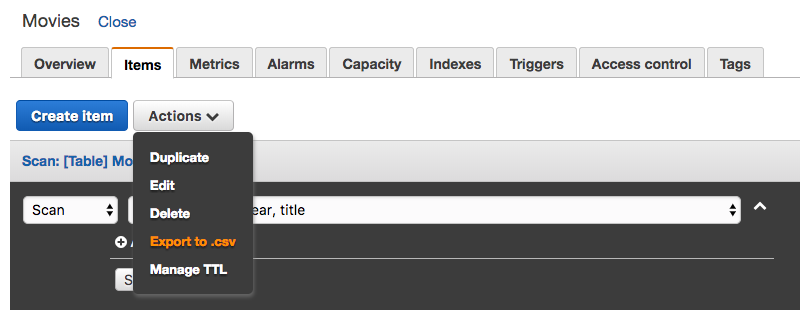
Now you'll have a CSV export of your data from DynamoDB, let's take a quick look:
$ more ~/Downloads/Movies.csv
"year (N)","title (S)","info (M)"
"1944","Arsenic and Old Lace","{    ""actors"" : { ""L"" : [        { ""S"" : ""Cary Grant"" },        { ""S"" : ""Priscilla Lane"" },        { ""S"" : ""Raymond Massey"" }      ]    },    ""directors"" : { ""L"" : [        { ""S"" : ""Frank Capra"" }      ]    },    ""genres"" : { ""L"" : [        { ""S"" : ""Comedy"" },        { ""S"" : ""Crime"" },        { ""S"" : ""Romance"" },        { ""S"" : ""Thriller"" }      ]    },    ""image_url"" : { ""S"" : ""http://ia.media-imdb.com/images/M/MV5BMTI3NTYyMDA0NV5BMl5BanBnXkFtZTcwMjEwMTMzMQ@@._V1_SX400_.jpg"" },    ""plot"" : { ""S"" : ""A drama critic learns on his wedding day that his beloved maiden aunts are homicidal maniacs, and that insanity runs in his family."" },    ""rank"" : { ""N"" : ""4025"" },    ""rating"" : { ""N"" : ""8"" },    ""release_date"" : { ""S"" : ""1944-09-01T00:00:00Z"" },    ""running_time_secs"" : { ""N"" : ""7080"" }  }"
Looks good, let's go ahead and start using MongoDB's open source tools to import this to our Atlas cluster.
Import your data Let's start moving our data into MongoDB Atlas. First, launch a new free M0 cluster (M0s are great for demos but you’ll want to pick a different tier if you are going into production). Once you have a new M0 cluster, you can then whitelist your local IP address so that you may access your Atlas cluster.
Next, you'll want to use the mongoimport utility to upload the contents of Movies.csv to Atlas. I'll provide my connection string, which I can get right from my Atlas control panel so that mongoimport can begin importing our data:
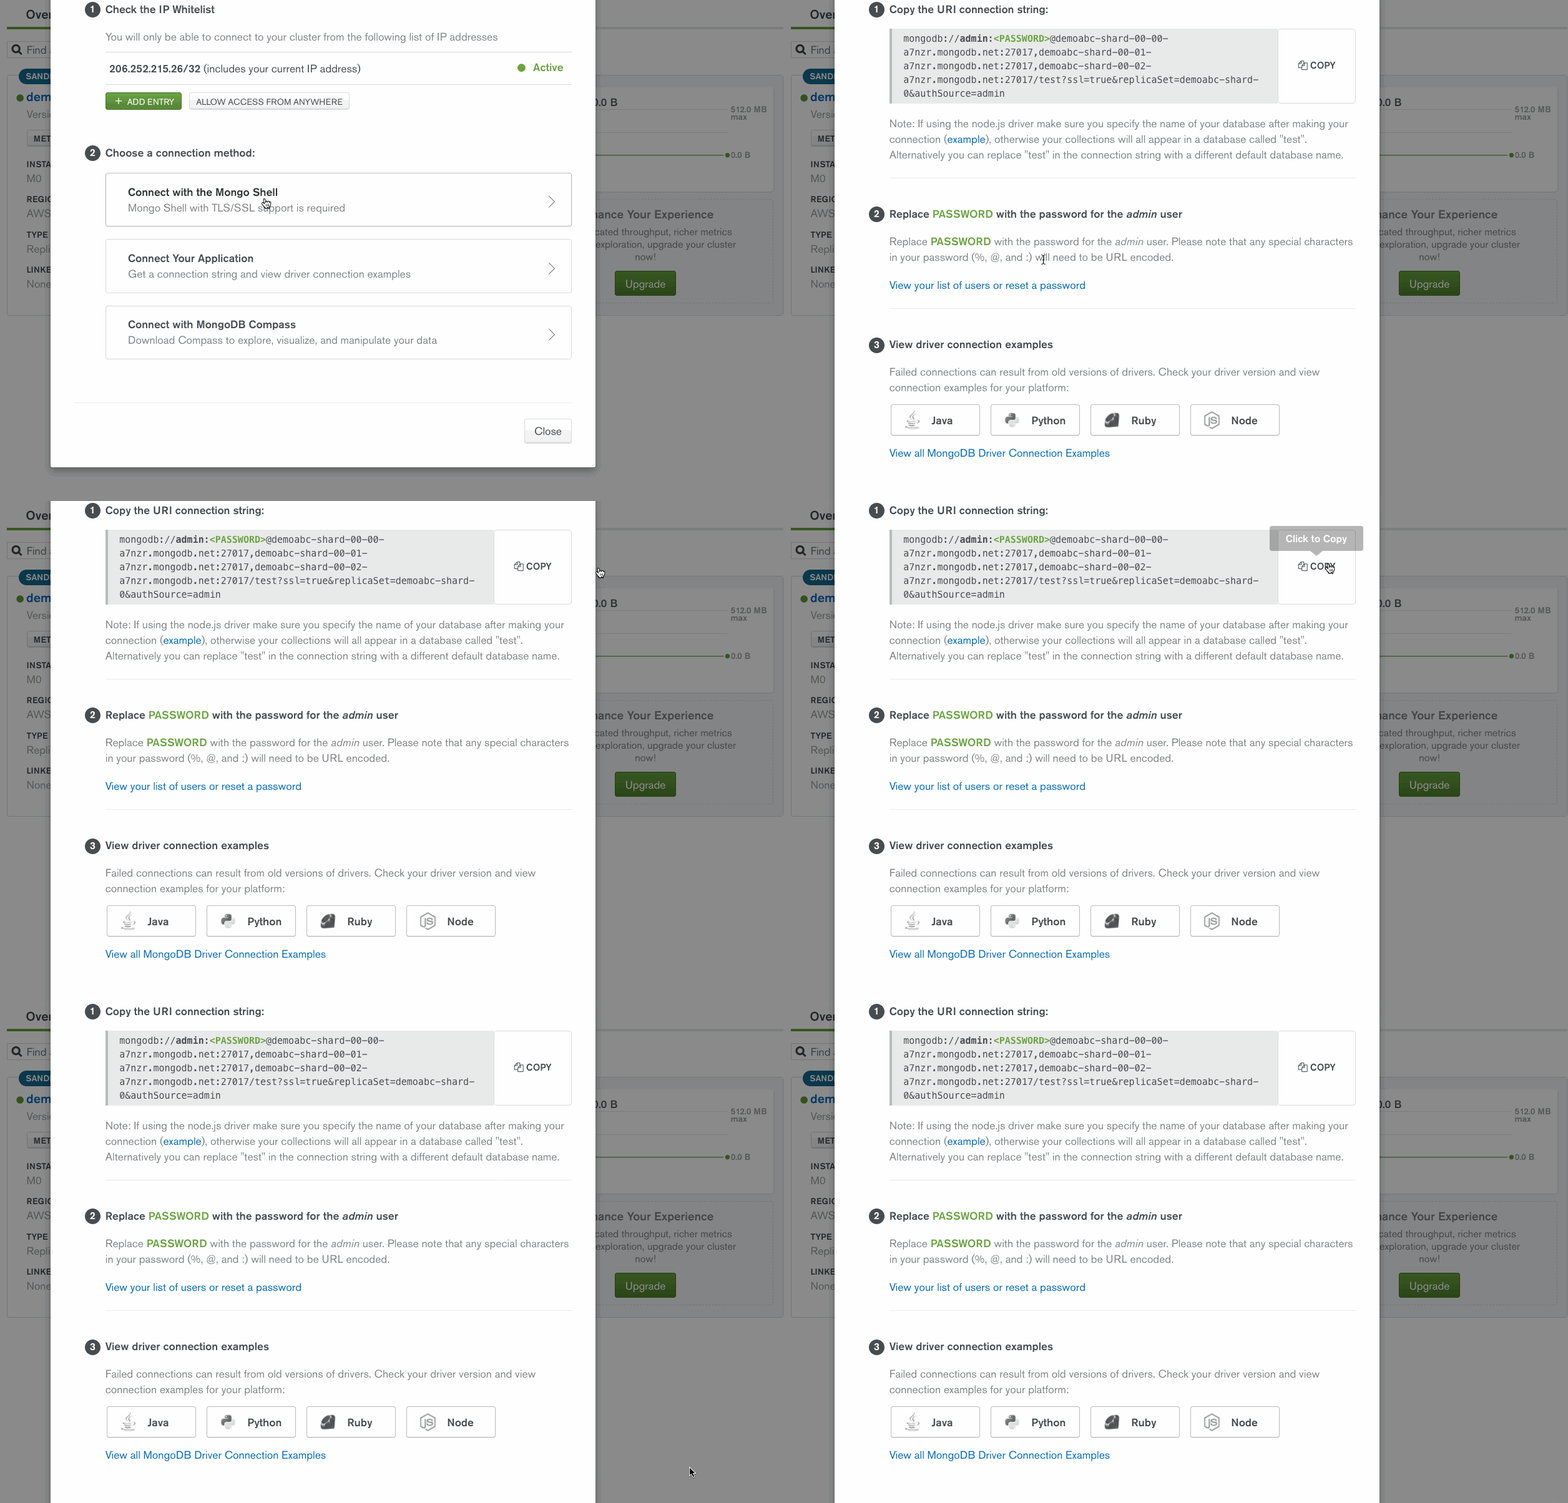
Now I can enter this into my mongoimport command along with some other important options:
mongoimport --uri "mongodb://admin:PASSWORD@demoabc-shard-00-00-a7nzr.mongodb.net:27017,demoabc-shard-00-01-a7nzr.mongodb.net:27017,demoabc-shard-00-02-a7nzr.mongodb.net:27017/test?ssl=true&replicaSet=demoabc-shard-0&authSource=admin"  --collection movies --file ~/Downloads/Movies.csv  --type csv --headerline
2017-11-20T14:02:45.612-0500  imported 100 documents
Now that our documents are uploaded, we can log into Atlas with MongoDB Compass and review our data:
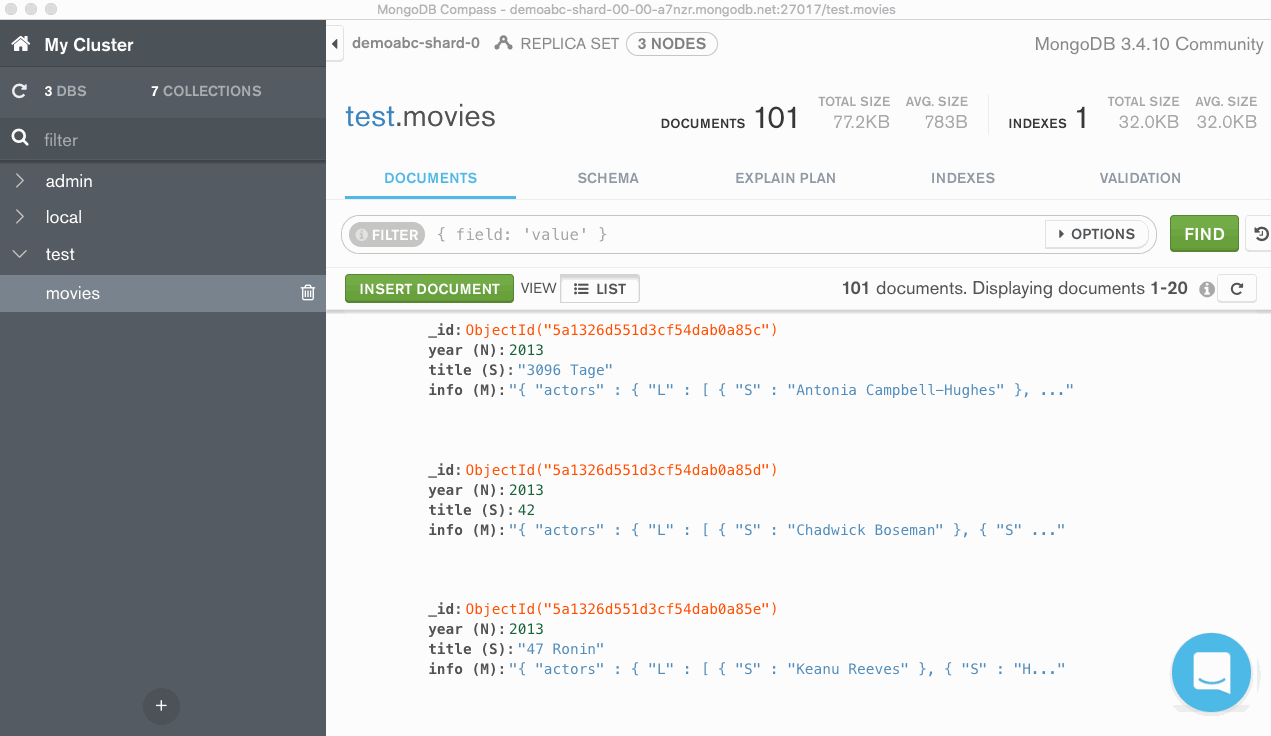
This is cool but I want to do something a little bit more advanced. Luckily, MongoDB’s aggregation pipeline will give us the power to do so
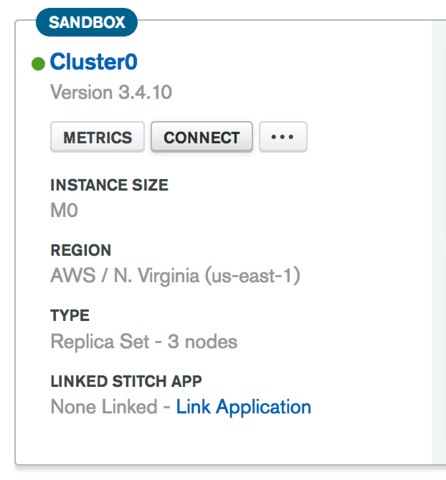
We'll need to connect to our shell here; I can press the "CONNECT" button within my Atlas cluster’s overview panel and find the connection instructions for the shell.
Once I am logged in, I can start playing with some different aggregations; here is a basic one that tells us the total number of movies released in 1944 in our collection:
db.movies.aggregate(

  // Pipeline
  [
    // Stage 1
    {
      $match: { year : 1944 }
    },

    // Stage 2
    {
      $group: { _id: null, count: { $sum: 1 } }
    },
  ]
);
With DynamoDB, we would have had to connect our database cluster to Amazon EMR, adding cost, complexity, and latency.
You can configure backups, ensure network security and configure additional user roles for your data all from the MongoDB Atlas UI.
Sign up for MongoDB Atlas today and start building better apps faster.